Send Email to Multiple Recipients: Step-by-Step Guide
If you’re working day in and out with emails, you know the struggle of sending an email to multiple recipients.
Sending each email one by one is time-consuming, and marking everyone in the same email (where the recipient can see others on the list) looks unprofessional. And if you’re not careful in your approach, your email might land in spam.
If you’re looking for the best way to send an email to multiple recipients without going through the struggle I just mentioned above, this blog is for you.
In this blog, we have covered a step-by-step guide on how to send emails to multiple recipients.
What does it mean to send emails to multiple recipients?
Sending emails to multiple recipients means sending a single email message to more than one person at the same time. The email can be addressed to all recipients at once, or it can be sent to a list of recipients through a mailing list or distribution group.
This is a common practice for businesses, organizations, and individuals who need to communicate with multiple people at once, such as sending a company-wide announcement, sharing updates with a team, or sending out cold email outreach.
Why Sending Emails to Multiple Recipients is Beneficial
Sending emails to multiple recipients can be beneficial for a number of reasons:
- Sending a single email to multiple recipients saves time and effort compared to sending individual emails to each recipient.
- It allows for effective communication with a large group of people, such as colleagues, team members, clients, or subscribers.
- It enables coordination and collaboration among team members, ensuring that everyone receives the same message and is on the same page.
- Email is a cost-effective way to communicate with multiple recipients compared to other forms of communication, such as phone calls or postal mail.
- Sending emails to multiple recipients can be an effective marketing tool, allowing businesses to reach out to a large audience with a targeted message.
However, it’s important to use caution when sending emails to multiple recipients to ensure that the recipients’ privacy and confidentiality are protected and to avoid spamming or sending irrelevant messages to recipients who may not be interested. And thus we have come up with a step-by-step guide that will help you to send emails to multiple recipients effectively:
A Step-by-Step Guide on How to Send Emails to Multiple Recipients
There are a number of ways to send emails to multiple recipients, and here are some of the best ways to do it:
How to Send Emails to Multiple Recipients in Saleshandy
Step 1: Sign up for Saleshandy
Sign up with Saleshandy and create an account.
Step 2: Create a Sequence
Once you have signed up, you will land in the Saleshandy dashboard. Click on “Sequences” and head to “Create Sequence” to get started.

Step 3: Compose your Email
Start composing the message you want to deliver to your recipients. Don’t forget to personalize your subject line and email body with mail merge tags. You can also attach documents/files to your email. After you’ve composed the email as per your liking, hit save.
Saleshandy offers an auto content guide that checks and provides suggestions that might be missing in your email body copy.

Step 4: Add Prospects
To add your prospect list in Saleshandy all you need to do is click on “Add Prospect”, select your CSV file, and upload the CSV in Saleshandy. If you want you can add manually as well. Saleshandy verifies and cleans the email list to ensure a lower bounce rate.

Step 5: Send Test Email
After writing the perfect email and setting up the sequence in the Saleshandy, it is time to send a quick test email to check for any corrections.

Note: The email ID you mentioned in the test email should be in the email list that you have uploaded.
Step 6: Schedule
It is time to send your email. All you need to do is activate your sequence, and Saleshandy will start sending your emails depending on the schedule you have set.
Click on the Pause button from your sequence to activate.

Note: For maintaining a good sender reputation score and better email deliverability, we keep a time interval between two consecutive emails of a few seconds/minutes. It will make your ESP believe it is a human-like sending.
How to Send Emails to Multiple Recipients in Gmail
To send an email to multiple recipients from your Gmail account, you can follow these simple steps:
Step 1: Getting Started
Begin by logging into your Gmail account.
Step 2: Write
Once you are in your Gmail account, look for the “Compose” box, and click on it to begin typing your email. This will open up a new email message window.
Step 3: BCC option
After writing the email, you can now proceed to add the recipients. However, if you would like to keep the recipients’ email addresses private, you can use the Blind Carbon Copy (BCC) option instead of the traditional Carbon Copy (CC). The BCC option will ensure that the recipients cannot see each other’s email addresses.
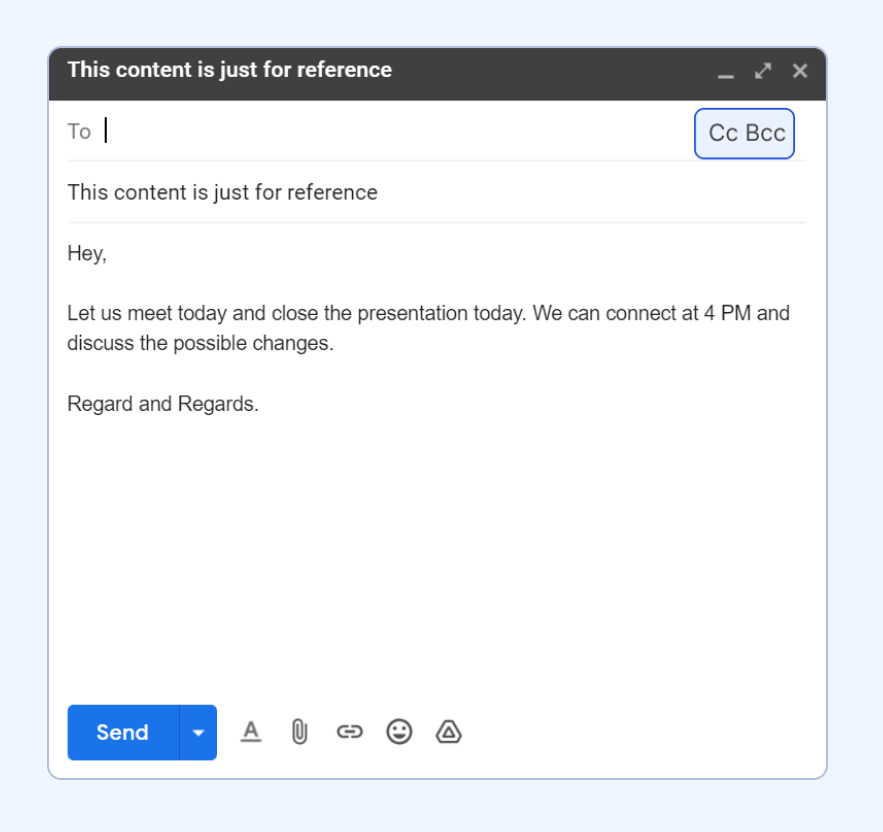
Step 4: Now fill in the BCC fields
To use the BCC option, click on the BCC field beside the CC field, which is usually located below the “To” field.
Then, type in the email addresses of the people you want to email or select one of your Gmail groups. It’s important to keep at least one person in the “To” field to ensure that your email doesn’t end up in the spam folder.
However, it is advisable not to use this method for over 10 recipients to avoid being flagged as spam.

Step 5: Hit the Send Button
Once you have added the recipients, proofread your email, and hit the send button to deliver your message to the intended recipients.
By following these simple steps, you can efficiently send an email to multiple recipients while keeping their email addresses private and avoiding being flagged as spam.
How to Send Emails to Multiple Recipients in Outlook
Step 1: Open your Outlook account and click on the new message
First, navigate to your Outlook account and proceed to click on the “New Message” button, which will create a fresh message.
Step 2: Click on Cc and Bcc to add recipients
Next, locate the “Cc” and “Bcc” options and click on them. This will enable you to add the email addresses of the recipients you intend to include in the message.

Step 3: Add the email
In order to ensure that the main recipient is the only visible recipient, select the primary recipient’s email address and include it in the “To” field.
Then, add the other recipients’ email addresses to the “Bcc” field. This will ensure that each recipient receives the message without exposing their email address to others.
Lastly, if you do not need to include any additional recipients in the “Cc” field, simply leave it blank.

Step 4: Send
Once you have completed these steps, you can confidently click the “Send” button, knowing that your message will be delivered to all recipients in an organized and efficient manner, while also preserving their privacy.
How to select multiple emails in Outlook
What are the different ways of selecting multiple emails in Outlook:
To select multiple emails in Outlook, follow these steps:
- Open your Outlook inbox and go to the email list.
- Click on the first email that you want to select.
- Hold down the “Ctrl” key on your keyboard.
- Click on any additional emails that you want to select.
- Release the “Ctrl” key when you have selected all the emails you want.
Alternatively, if you want to select a range of emails, you can use the shift key:
- Click on the first email that you want to select.
- Hold down the “Shift” key on your keyboard.
- Click on the last email that you want to select.
- Release the “Shift” key when you have selected all the emails you want.
Once you have selected the emails, you can perform various actions on them, such as moving them to a different folder or deleting them.
Sending Emails to Multiple Recipients based on your requirements:
How to Send Emails to Multiple Recipients with Different Attachments
Here’s a step-by-step guide on How you can send emails to multiple recipients with different attachments in Saleshandy:
Step 1: Sign in
Sign in to your Saleshandy account, if you still don’t have an account create one!
Step 2: Create your Sequence
Once you have signed up, you will land in the Saleshandy dashboard. Click on “Sequences” and head to “Create Sequence” to get started.

Step 3: Write your Email
Compose the message you want to send to your recipients. Don’t forget to personalize your subject line and email body with mail merge tags.
Here you need to attach documents/files to your email.
For example, let’s say you want to send two different attachments to two different groups of prospects. So in that case attach your first attachment here.
After you are done with it, hit save.

Step 4: Create a New Sequence & Write your Second Email
As you hit save after writing your first email you will be redirected to your email sequence tab. You need to create a new sequence you name it as “second group of prospects” (or anything you want).
Within your new sequence, you need to craft your email again, it can be a completely new version or you can use the same version that you are going to send to your first list of prospects. But the only thing you need to make sure of is you are using a different attachment here.
So continuing with our example, choose the second attachment that you want to send to your second group of prospects and hit save.

Step 5: Add Prospects
To add your first prospect list all you need to do is click on “Add Prospect”, select your CSV file, and upload the CSV in Saleshandy. And similarly, you need to add the second prospects list in the second sequence that we created in our previous step.

Step 6: Schedule
Once you have both your sequences ready with different attachments, It is time to send your email. All you need to do is activate your sequence, and Saleshandy will start sending your emails depending on the schedule you have set.

How to Send Emails to Multiple Recipients with different attachments in Outlook
Step 1: Getting the Basics Done
Sign-up for outlook if you haven’t. Open Outlook and click on “New Email” to create a new email message.
Step 2: Open Excel/Google Sheet
Our next step is to put the names of the files into the specific columns of our data source table.
Let’s call the columns “Attachment 1” and “Attachment 2”.

Step 3: Perform the mail merge.
Launch the utility from the Outlook Ribbon or as a standalone application.
Once the General tab settings have been made according to the utility configuration instructions, you can proceed to the Attachments tab to configure attachment mail merging.
To attach files to your email, you have three options:
- To attach the same files to all the emails, attach the files to the letter template.
- You can also attach files from a folder.
- Fill in the Attach files from the table field if you want to send the custom documents to every address.

Step 4: Send
Then, click the “Send” button confidently, knowing your message has been delivered to all recipients in an organized and efficient manner.
How to Send Emails to Multiple Recipients without them knowing
Here’s how to send the same email to multiple recipients separately in various email clients (Gmail, Outlook, etc.) without letting them know:
How to Send Emails to Multiple Recipients without them knowing in Gmail
Step 1: Create a New Email
To get started, log in to your Gmail account and click on the “Compose” button in the top left corner of your screen. This will open a new email window where you can compose your message.

Step 2: Enter “Undisclosed recipients”
In the “To” field of the new email, enter “Undisclosed recipients” followed by your own email address in angle brackets. This ensures that your email address is not visible to the recipients.
For example, it should look something like this: “Undisclosed recipients<your email address>”.

Step 3: Enter the Email Addresses
Next, click on the “BCC” button (which stands for “blind carbon copy”) to add the email addresses of your recipients. This is where you can add all the email addresses you want to send your message to, separated by commas.
By using the “BCC” field, you ensure that each recipient’s email address is hidden from other recipients, which can help protect their privacy and reduce the risk of your email being marked as spam.

Step 4: Compose a Message and Send
Once you have added all the necessary email addresses, compose your message as you normally would. Make sure to include a clear subject line and a brief, concise message that gets straight to the point.
When you’re ready to send your email, click on the “Send” button. Depending on the number of recipients and the content of your message, Gmail may display a warning message or limit the number of emails you can send at once.
It’s important to note that while Gmail can be a convenient way to send bulk emails, it’s not designed for sending large volumes of emails at once. If you need to send emails to a large number of recipients on a regular basis, you may want to consider using a dedicated email marketing service instead.
How to Send Emails to Multiple Recipients without them knowing in Outlook
Step 1: Getting started
First, open Outlook, and from your Home tab go to the People tab.

In the People Tab click on the dropdown you will get to see three options, out of them select “New contact”.

Step 2: Adding Undisclosed Recipients
In the Full Name text box, enter “Undisclosed Recipients.” In the Email text box, enter your email address. This is important, because the email will be sent from your address, and you want the recipients to know who it’s from. Once you’ve added your email address, click Save & Close.

Step 3: Reached a Milestone
Now you’ve reached a milestone! Close the People Tab and Create a new email message in Outlook.
Step 4: Let’s move forward
In the To field, type “Undisclosed Recipients.” As you type, Outlook will display a list of suggestions. Choose the contact you just created for undisclosed recipients. This is important because it will make sure that the email is sent to the recipients, but without revealing their email addresses to each other.

Step 5: Select Bcc
Now, it’s time to add the email addresses of the recipients you want to email. Click on the Bcc button and add their email addresses. If you’re typing the email addresses manually, separate each one with a semicolon.
This is important because it will make sure that the email is sent to each recipient, but without revealing each other’s email addresses.

Step 6: Done
Now, you can compose your message as you would normally. Make sure to check your message carefully before you hit Send. Once you’re ready, select Send and your email will be sent to all of the recipients without revealing their email addresses to each other.
Conclusion
In conclusion, sending emails to multiple recipients can be a daunting task, but with the right tools and strategies, it can be a breeze. We’ve explored some useful tips and best practices for sending emails to multiple recipients, including creating clear and concise email content, personalizing your emails, and avoiding spam filters.
However, if you want to take your email communication to the next level and ensure your emails are delivered, opened, and responded to, we highly recommend Saleshandy. With Saleshandy, you can send personalized emails to multiple recipients, track email engagement, automate follow-up emails, and much more.
Don’t let the hassle of sending emails to multiple recipients hold you back from achieving your business goals. Sign up for Saleshandy today and start sending effective emails to your target audience. It’s the best option to streamline your email communication and increase your chances of success.
Source : https://www.saleshandy.com/blog/send-email-to-multiple-recipients/


")