How To Use CC and BCC in Gmail Effectively

Email is one of the most efficient communication channels professionals use. It is fairly versatile and has features that help you communicate multi-dimensionally among your recipients.
CC and BCC in the email are two such features. Many professionals don’t use it to its full potential. So we’ll cover step-by-step instructions on using CC and BCC in your emails for Gmail. You can access CC and BCC on every email service, but we will be covering this guide on Gmail, and everything here would apply to your email service as well.
Let’s explore how to use CC and BCC in Gmail, its best practices, and efficient methods that can help you boost your email outreach.
Index
- What is CC and BCC in Gmail?
- Drawbacks of CC and BCC in Gmail
- Send emails to multiple recipients with SalesHandy
- Advantages of sending multiple emails with SalesHandy
What is CC and BCC in Gmail?
While sending an email, you must have come across the CC and BCC fields beside the To field. It allows you to add more recipients before you send your email. Both CC and BCC allow you to add recipients to the email thread, but there are a few fundamental differences between the two.
Let’s compare the differences between CC vs BCC.
Carbon Copy (CC) is used to send a copy of the email to someone who needs to be involved in the conversation, without needing to actively participate. For example, if you are applying for leave via email to your manager, you can add your colleagues in CC just to inform them about your absence.
Blind Carbon Copy (BCC) is used for sharing a copy of the email with someone without letting the primary recipient know about it. Similar to CC, the recipient added in the BCC section doesn’t take part in the conversation. For example, if you send a discounted quotation to a customer and want to send a copy to your manager, you can add your manager to BCC. Your customer won’t get any idea about the copy sent to your manager.
Now that we’ve learned the differences between CC and BCC, see how we can use either of them in Gmail.
1. How to use CC in Gmail
To start sending an email with CC, follow the steps added below.
- Login to your Gmail account and click on the Compose button
- Add the primary recipient in the To field
- Click on the CC button present in the right side corner of the To section
- Add all the recipients’ email addresses in the CC section you want to send a copy of your email
- Draft your email copy and click Send
All your recipients will receive the email and will also be able to see new responses to the thread.
2. How to use BCC in Gmail
To start sending an email with BCC, please follow the simple steps added below.
- Login to your Gmail account and click on the Compose button
- Add the primary recipient in the To section
- Click on the BCC button present in the right side corner of the To section
- Add all the recipients’ email addresses in the BCC email section you want to send a copy of your email
- Draft your email copy and click Send

All your recipients will receive the email, and your primary recipients wouldn’t be aware of BCC recipients.
You can add all your recipients in the BCC section for sending out emails to multiple recipients. This way, none of your recipients will know of other recipients tagged in BCC.
Although it’s one way to send multiple emails at once, there are still several drawbacks associated with it.
Drawbacks of CC and BCC in Gmail
1. Email address is shared with every recipient

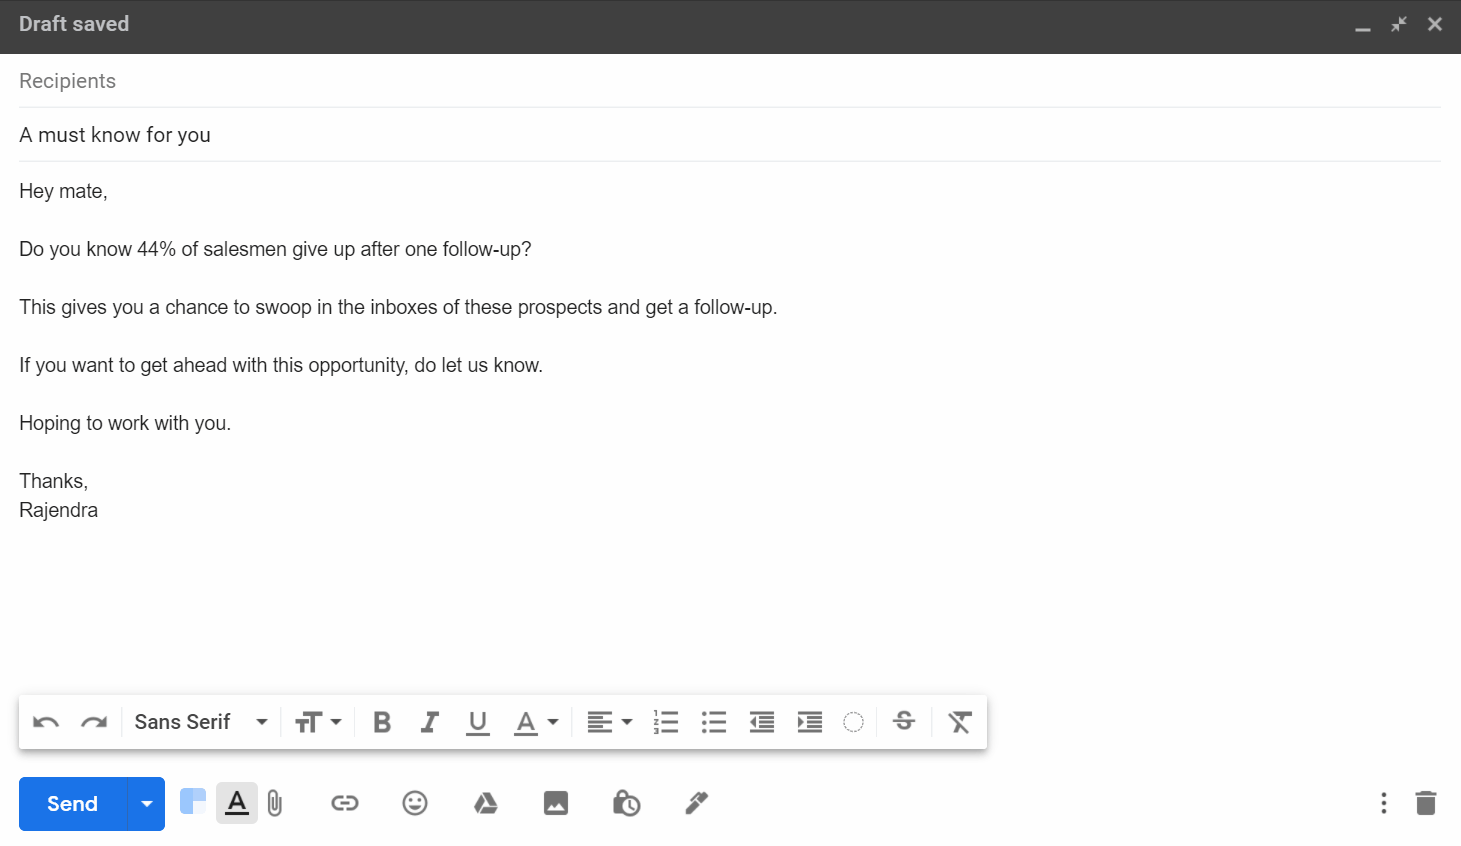
Sometimes users add multiple recipients in the CC section of the email with the intent to send multiple emails at once. In such cases, each recipient’s email address is visible to other recipients hampering everyone’s privacy. Usually, recipients do not entertain this practice as it also goes against professional email etiquette.
2. Impractical solution for mass emails
Adding too many recipients in the CC and BCC fields decreases your email deliverability rate. Gmail’s algorithms might trigger it as a SPAMMY or Promotional email. Your emails are likely to get blocked. If this happens frequently, your Gmail account might even get suspended permanently.
Read this article: How to Avoid Gmail Promotions Tab- A Step-by-Step Guide
3. Lacks email personalization
Email personalization is an essential part of any formal email that drives conversions. Personalized emails provide a 24.28% email open rate and a CTR of 3.87%.
When you add multiple recipients in the CC and BCC fields, you cannot personalize the email for each recipient. This is likely to impact your open rates, and ultimately your email response rates. This is one of the bigger reasons to avoid sending multiple emails using CC and BCCs.
4. The risk with the Reply all button

Open your Gmail inbox and check any email you received with multiple recipients attached to it. While replying to the email, you get two options. Reply and Reply to all. If you click on the Reply to all button, your reply will be sent to all the recipients attached in the email.
Even in the case of BCC, if anyone of your recipients sends their response by clicking on the Reply to all button, all your recipients attached in BCC will receive the email. This results in your email content is shared with everyone in the thread and not just the sender — which might be unintended and embarrassing.
5. No analytics and tracking
The purpose of sending out multiple emails is to be able to engage everyone on the recipient list. Using BCC and CC for sending out multiple emails at once doesn’t give you an insight into your recipient’s open, click and response behavior. Platforms like SalesHandy exist where you can send out multiple emails, and track and analyze the response and open rates, helping you organize and make the most of your outreach.
6. Risk of the failed delivery and email bounces
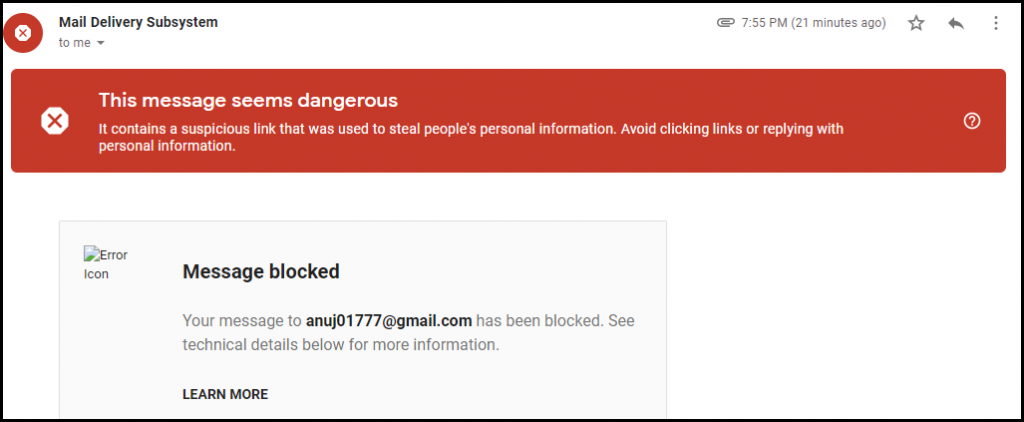
When you add multiple recipients to the CC or BCC field, your email might look suspicious to your ESP. Users usually use this method for spamming and promotions, and hence there is a mechanism built into email services that block these emails.
Adding too many recipients in CC and BCC could result in failed deliveries and email bounces. Your sender reputation score will decrease rapidly, negatively affecting your email account’s health. Your email account might get blacklisted by various other ESPs, and ultimately it will get suspended.
So, it’s always recommended to refrain from sending mass emails using CC and BCCs.
If you are looking to send mass emails to multiple recipients using Gmail, there are better solutions that wouldn’t need you to use CC and BCC. You can use an email automation tool like SalesHandy to schedule emails to all your recipients in one go.
How to send emails to multiple recipients with SalesHandy
SalesHandy is an advanced email automation tool that helps you in sending personalized email campaigns, automated follow-up emails, and analytics to help you track engagement on your emails.
Follow the steps below to start sending mass emails on Gmail using SalesHandy:
1. Signup with SalesHandy
- Go to the SalesHandy signup page and click on the Signup with Google button

- Provide necessary permissions, and your account is all set for mass email campaigns
- Login to the SalesHandy web-app and start creating your first campaign
2. Create an email campaign
- Click on Email Campaign from the left side menu followed by the New Campaign button on the top right corner
- You will land on the campaign editor screen
- Name your campaign appropriately and upload your recipient list in the form of a CSV

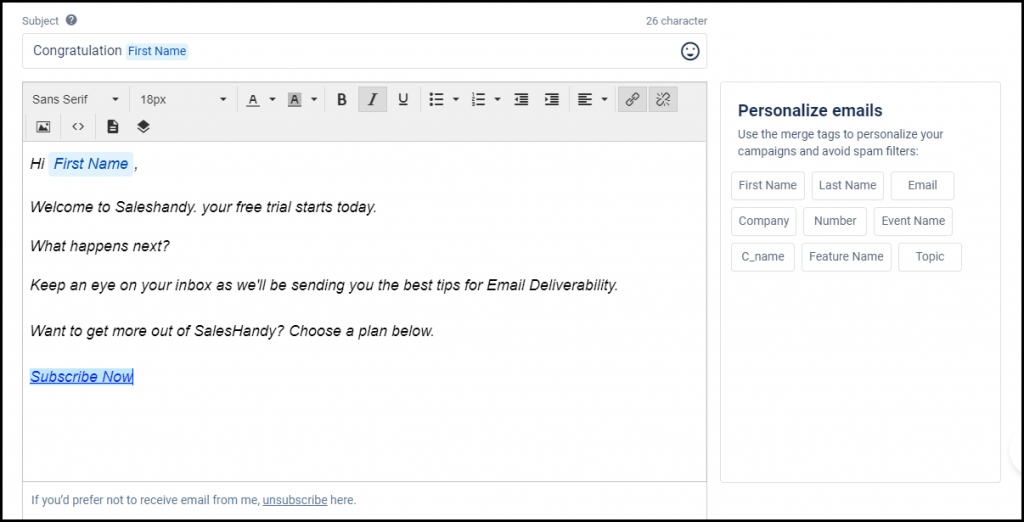
- Scroll down to write your email subject line and email body
- You can use the merge tags and emojis in the editor to personalize your emails.
- Add an unsubscribe link at the end of your email to allow your recipients to opt-out of your emails.
- Scroll down and click on the (+) button to add the follow-up stage to your emails. You can choose between 3 trigger conditions— not opened, not replied, and regardless to schedule your follow-up emails accordingly for each recipient.
- Once you are set with your email content click on send a test email and check it in your inbox and see how it would look like for your recipients.
3. Schedule your email campaign
- As the last step, scroll down to the Preference section of the email campaign
- SalesHandy enables you to schedule your email across 40 different time zones. Choose the desired time and time zone according to your preference to send your emails. For example, If your recipient is based in Johannesburg, South Africa, you can choose the same timezone without calculating the GMT time gap.
- Select a time gap between two emails. It is recommended to maintain a gap of 60- 90 seconds between two consecutive emails for the best results. It’s good for your email deliverability as it mimics human sending behavior.
- Accept the terms and conditions. Click on the Schedule campaign button to send your emails as per your desired time.

Watch the video for a detailed walkthrough
Advantages of sending mass emails with SalesHandy
1. Email Personalization

Unlike the basic CC/BCC method, you can add personalization to all your emails with SalesHandy. While drafting your email copy, you can easily select the merge tags to apply personalization in each email.
Adding personalization to your emails will make them stand out. This increases the likelihood of your emails being opened and consequently, receiving a response.
2. Individual email to each recipient
While you send mass emails using CC, all your recipients find themselves in the CC section of your email. With SalesHandy, all your recipients will receive the email and find themselves in the To section of the email. This makes every email look like a 1-1 conversation, and hence, more human and personal.
3. Better email deliverability
All emails from SalesHandy are sent directly from your Gmail account to your recipient’s account. The emails are personalized, so each email is different. Also, there is no CC/ BCC in the emails by default to trigger the SPAM filter. This helps you maintain your sender reputation and get better email deliverability.
SalesHandy also randomizes the time gap between sending two emails, to mimic human-like behavior. ESP quotas are also taken care of, which can help you increase your sender reputation and stay away from SPAM, bounces and blocks.
3. Advanced email analytics

Analytics help you in tracking your recipients’ engagement with your emails. You can know if your recipient has opened your emails, with time stamps recorded every time they do so.
SalesHandy also provides you with campaign analytics to check the performance of your entire campaign. You can download the report of the individual stages of the campaign to evaluate and optimize it for the future. You can also track template level engagement — i.e. opens and responses of a template throughout its lifetime, via templates dashboard on SalesHandy.
3. Automated follow-ups

Automated follow-ups on SalesHandy allows you to send follow-ups based on your recipient’s engagement to your first email. You can choose from three conditions— not open, not replied, and regardless. You can schedule follow-ups for up to 9 stages, without having to manually track and send them yourself, helping you spend more time talking to your customers.
4. Best solution for mass email
Campaigns on SalesHandy is one of the best ways to send out bulk email campaigns. You can upload a large email list adding up to 2000 email recipients in one go. SalesHandy’s optimizations around email deliverability ensure all your emails get delivered to your recipients without Gmail’s typical volume sending limitations. SalesHandy takes care of your ESPs guidelines, sending limits and tons of other requisites to make sure your email lands in the primary folder.
Read this article: Gmail Sending Limits: All you need to know
Post-delivery of your emails, SalesHandy helps you with unlimited email and link tracking for keeping a check on your recipient’s engagement.
Conclusion
It’s very essential to know the right use of CC and BCC function. They’re versatile and enable multiple recipients to engage in a conversation. Although using them to send out bulk emails isn’t wise – as we discussed throughout the article. There are better tools and services available that enable you in automating such emails, helping cope with Gmail’s limitations.
How do you use CC and BCC in your emails? Have you ever come across CC related blunders in your email? Share your experience in the comments!
Source : https://www.saleshandy.com/blog/use-cc-bcc-gmail/
![7 Best GMass Alternatives 2024 [NEW List!]](https://s.w.org/images/core/emoji/13.1.0/72x72/2b50.png)


")